INFORMATION Simple Water Effects Tutorial for Blender READ NOW - Welcome to our blog
Home Design Minimalist, we have provided articles about INFORMATION Simple Water Effects Tutorial for Blender READ NOW, as you're looking for, this site also provides more information about the house like a
home design that is
simple, luxury, design bedrooms, bathrooms, windows and doors are beautiful will make you comfortable at home with your family, interior and exterior will be tempting you to have a house like that we display.
You are looking :
INFORMATION Simple Water Effects Tutorial for Blender READ NOW
Link article :
INFORMATION Simple Water Effects Tutorial for Blender READ NOW
Article 3d modelling,
Article 3d rendering,
Article blender,
Article displacement,
Article easy,
Article effects,
Article materials,
Article modifier,
Article NormalMap,
Article texture,
Article water,
You can also see our article on:
INFORMATION Simple Water Effects Tutorial for Blender READ NOW
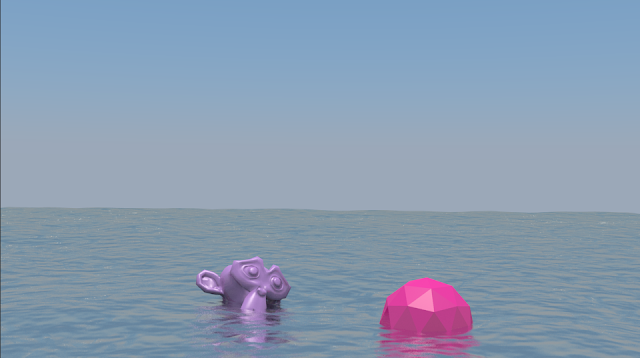 |
| The Finished Effect |
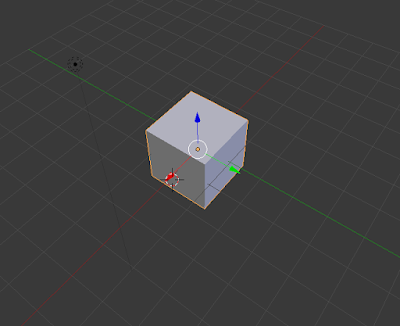
Step 1:
Delete the default
Cube and the
Lamp by selecting and hitting delete followed by clicking the on screen prompt. You will not need these in your scene.
 |
| Step 1: |
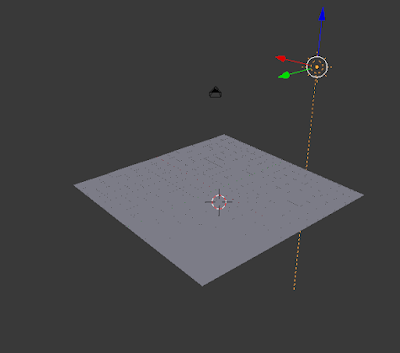
Step 2:
Add a
Plane and a
Sunlight (placement doesn't matter for sunlight) through the
Add tab, followed by scaling the plane up by pressing the
S key while it is selected. The sun will create the reflection and all lighting.
 |
| Step 2: |
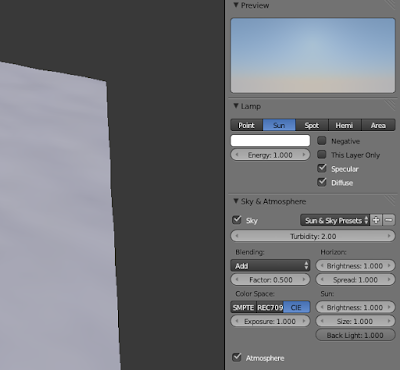
Step 3:
Select the
Sunlight, and then go into the
Sun Data tab which is a little sun icon where
Materials would be, check the
Sky box and
Atmosphere box, then change the
Factor of the sky to 0.5. This gives the background a realistic sky when you render the scene.
 |
| Step 3: |
Step 4:
Select the plane and enter the
Materials tab and add a new material, change the
Specular type of the plane to
Blinn and change the specular
Intensity of the highlight to 0.2. Then check the
Mirror box of the plane and in the mirror dropdown, set the
Reflectivity to 1.0 then set the gloss amount to 0.75.
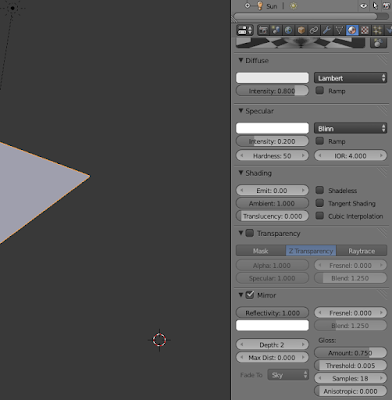 |
| Step 4: |
Step 5:
Enter the
Texture tab and add a new texture, and under
Mapping change the
X, Y &
Z size to 7.0, then uncheck the
Color box under the
Influence tab, then under the
Geometry heading change the normal to 0.1.
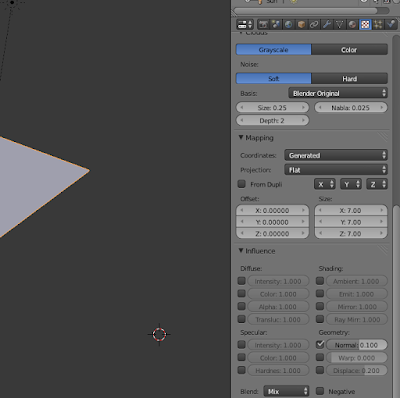 |
| Step 5: |
Step 6:
Go to the world tab and check the
Ambient occlusion box and set it to 0.3.
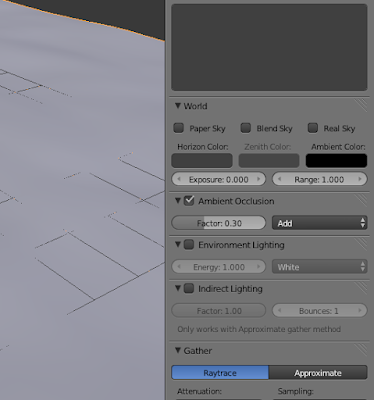 |
| Step 6: |
Step 7:
Enter
Edit mode and select the plane, then
Subdivide it 7 times. This is to give it more Geometry for the
Displace modifier to take effect. We will add this in the next step.
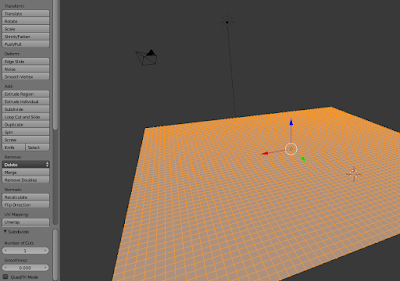 |
| Step 7: |
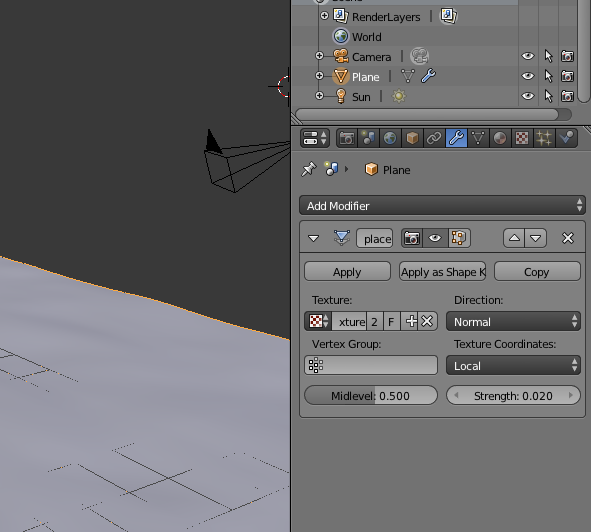
Step 8:
Now enter the
Modifier tab and add a
Displace modifier and click the little texture box and select texture from the dropdown, now enter
Object Mode and from the dropdown click texture, then change the
Strength to 0.02.
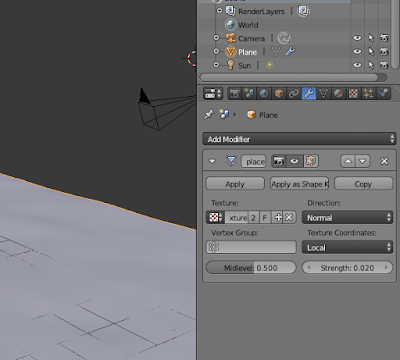 |
| Step 8: |
Step 9:
Under the
Object tools menu on the left, change the
Shading to
Smooth.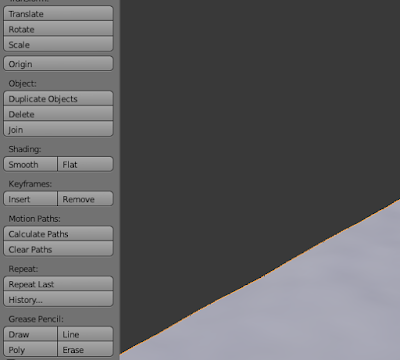 |
| Step 9: |
Conclusion
If you followed my instructions correctly you should end up with something like this, my camera has been fixed into a suitable position for the effect to show it off, I also added a Monkey and an Icosphere from the Add tab to give the effect of floating objects. You don't have to do this.
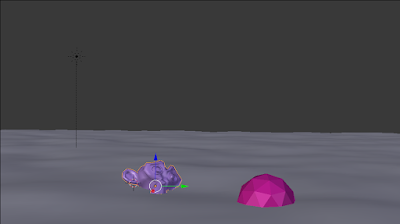 |
| Pre Render |
Final Render
Now hit
F12 for the final render. Congratulations now you know how to make water effects for your renders.
 |
| Final Render |
So information about INFORMATION Simple Water Effects Tutorial for Blender READ NOW
Such articles that discuss INFORMATION Simple Water Effects Tutorial for Blender READ NOW, may be useful to you in finding the inspiration to build houses.
You are reading arikel entitled
INFORMATION Simple Water Effects Tutorial for Blender READ NOW and link this article you can save
http://homedesignminimalist1.blogspot.com/2016/01/information-simple-water-effects.html Hopefully information about
this is helpful for you.
,
3d rendering,
blender,
displacement,
easy,
effects,
materials,
modifier,
NormalMap,
texture,
water,


0 Response to "INFORMATION Simple Water Effects Tutorial for Blender READ NOW"
Posting Komentar